Tuesday, January 27, 2015

PVC Pipe Ball Drop / Water Run

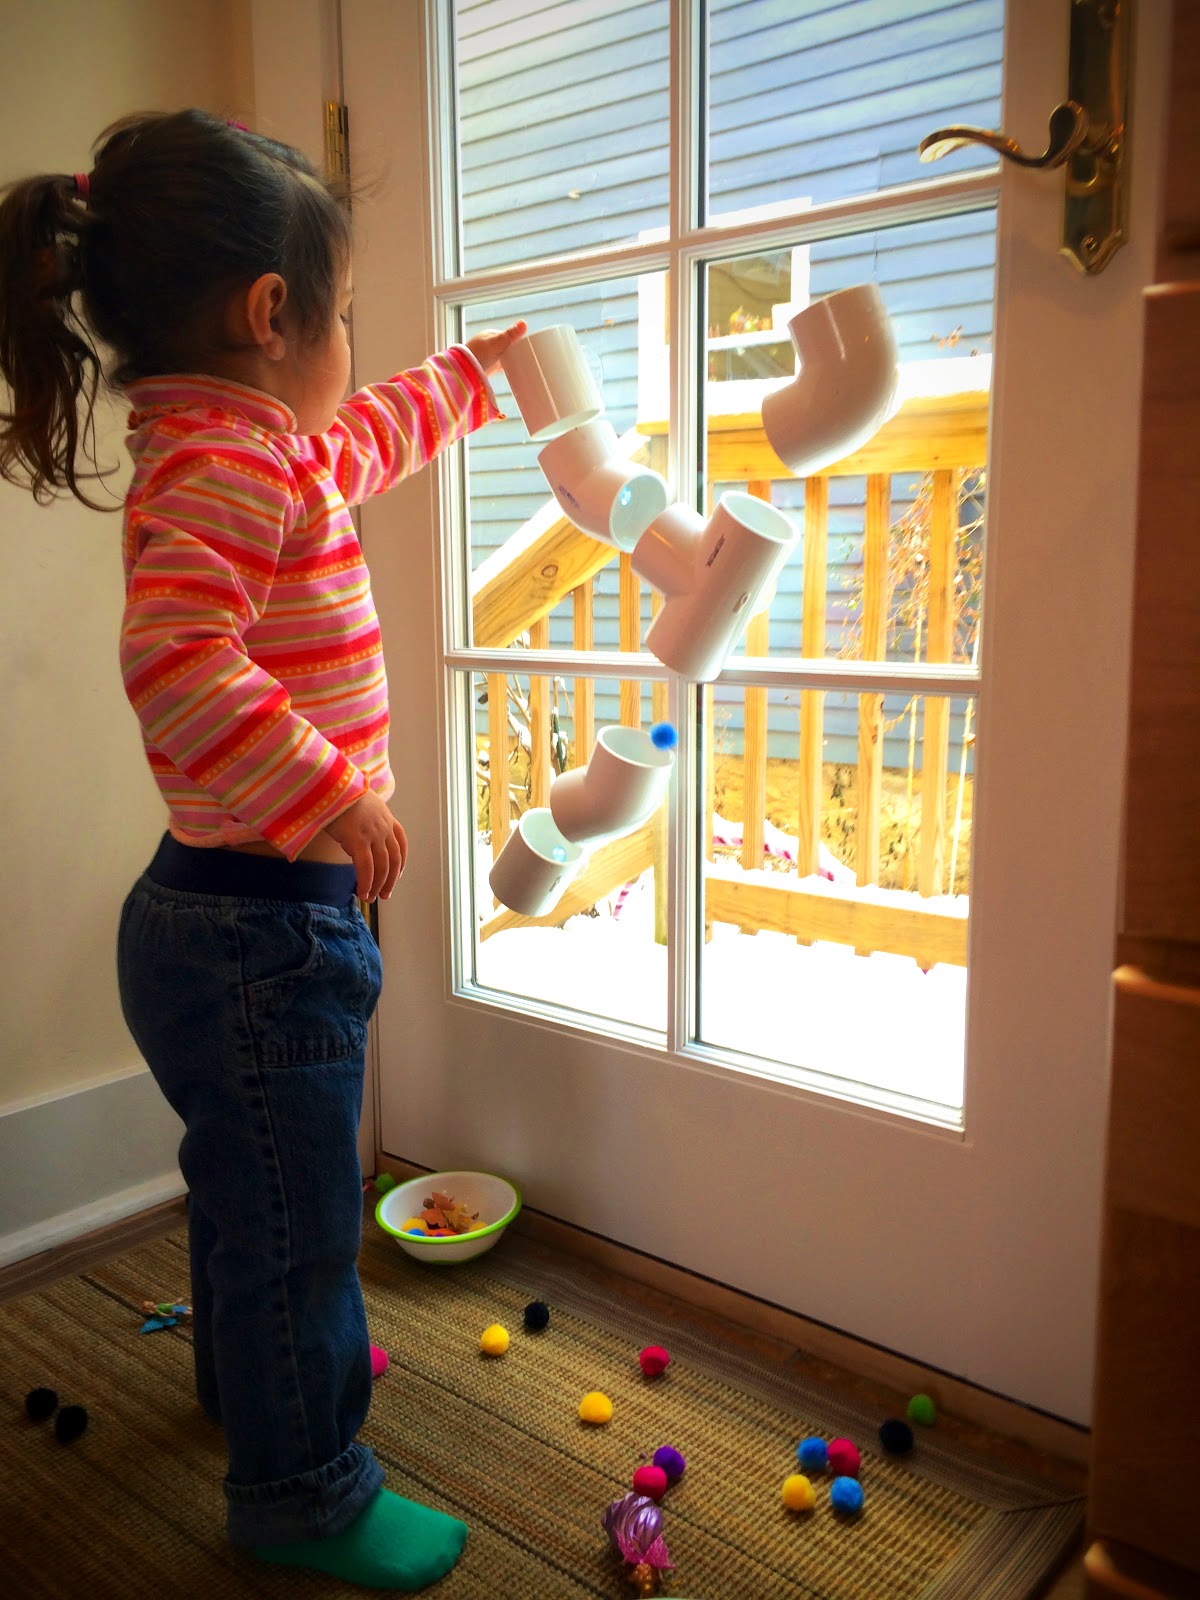
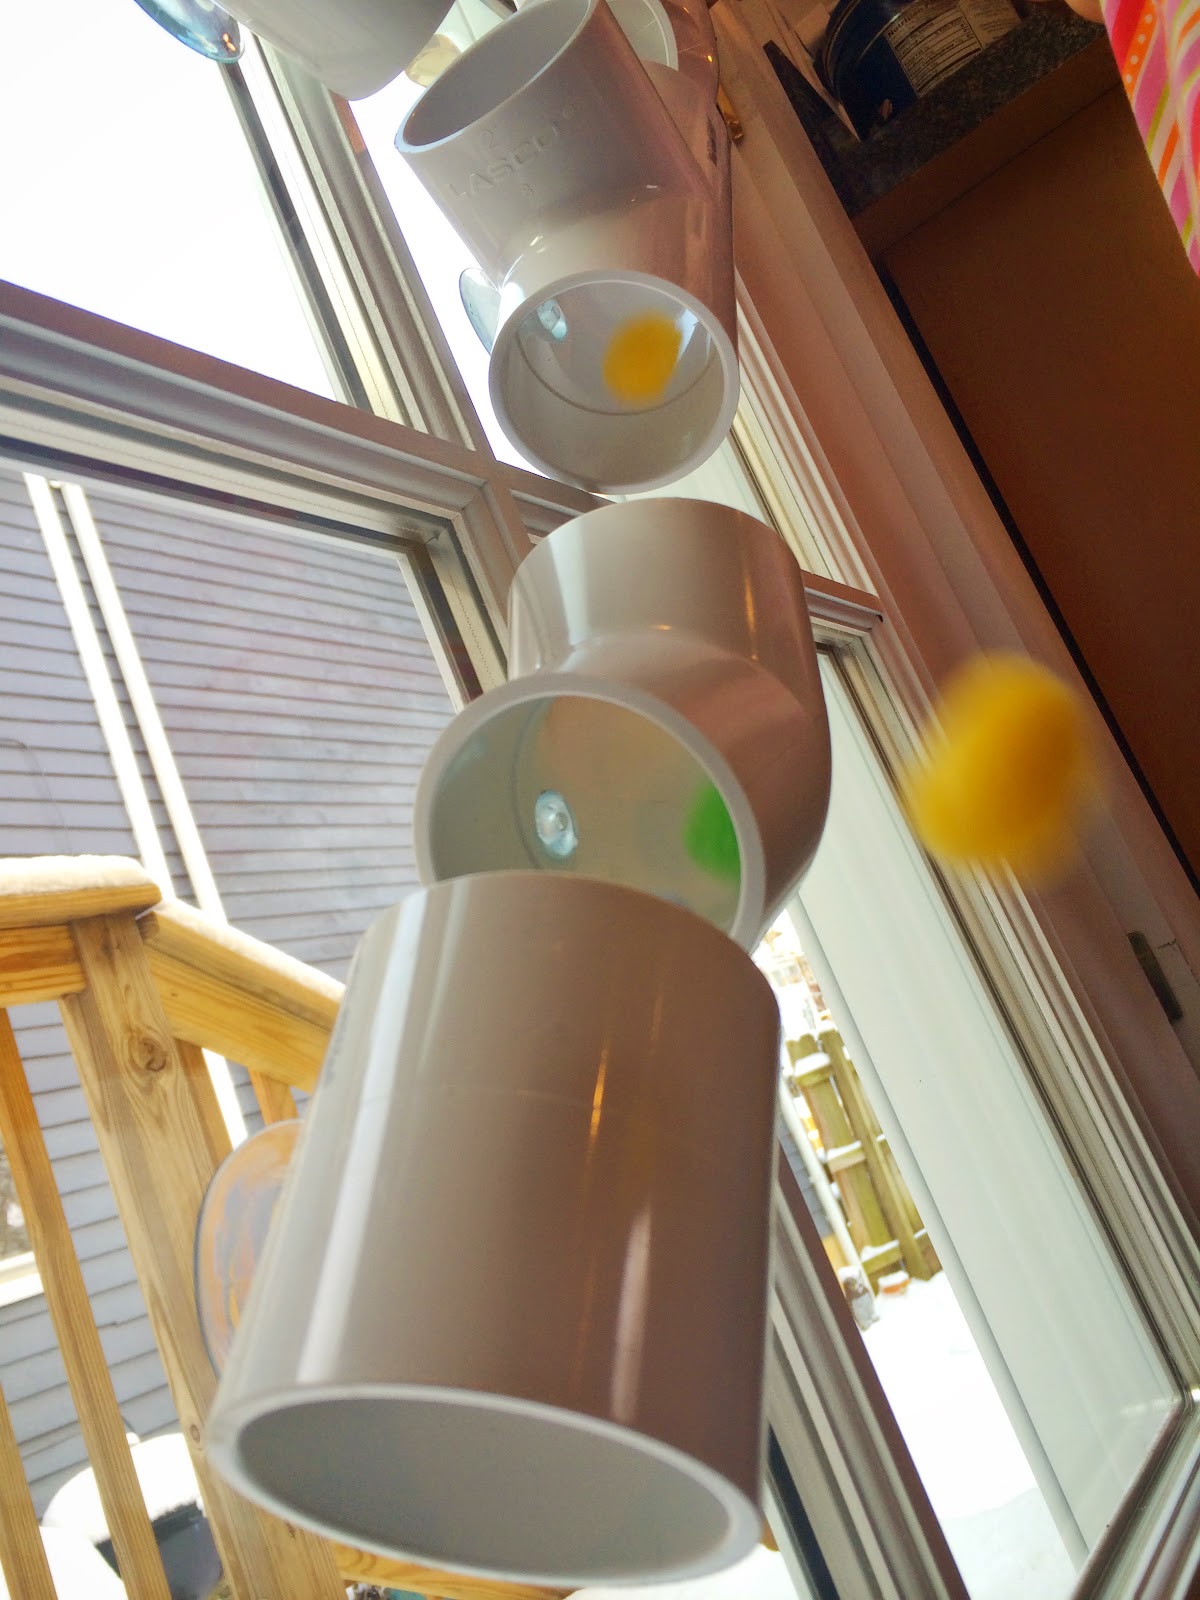
We made this PVC PIPE BALL DROP / WATER RUN last Summer to take with us to the beach...beach houses usually have large windows and sliding doors so I knew it'd be the perfect place to test it out. We originally used corn kernels to drop through the tubes, which turned out to be a huge mess, but we had fun!!! As cabin fever set in this week with cold, snowy weather outside I decided to bring out the PVC PIPE BALL DROP / WATER RUN again! This time we used poof balls (as well as plastic fairies and frogs) to drop through the tubes and it worked great! You could also put this up in the shower and dump water through the tubing to make a water run...I think we'll try that next! The materials for this project only cost about $10 and it provides hours of fun!


Materials needed:
-PVC connectors and elbows 
-suction cups
-drill
-flathead screw driver
-poof balls, beans, feathers, pennies...

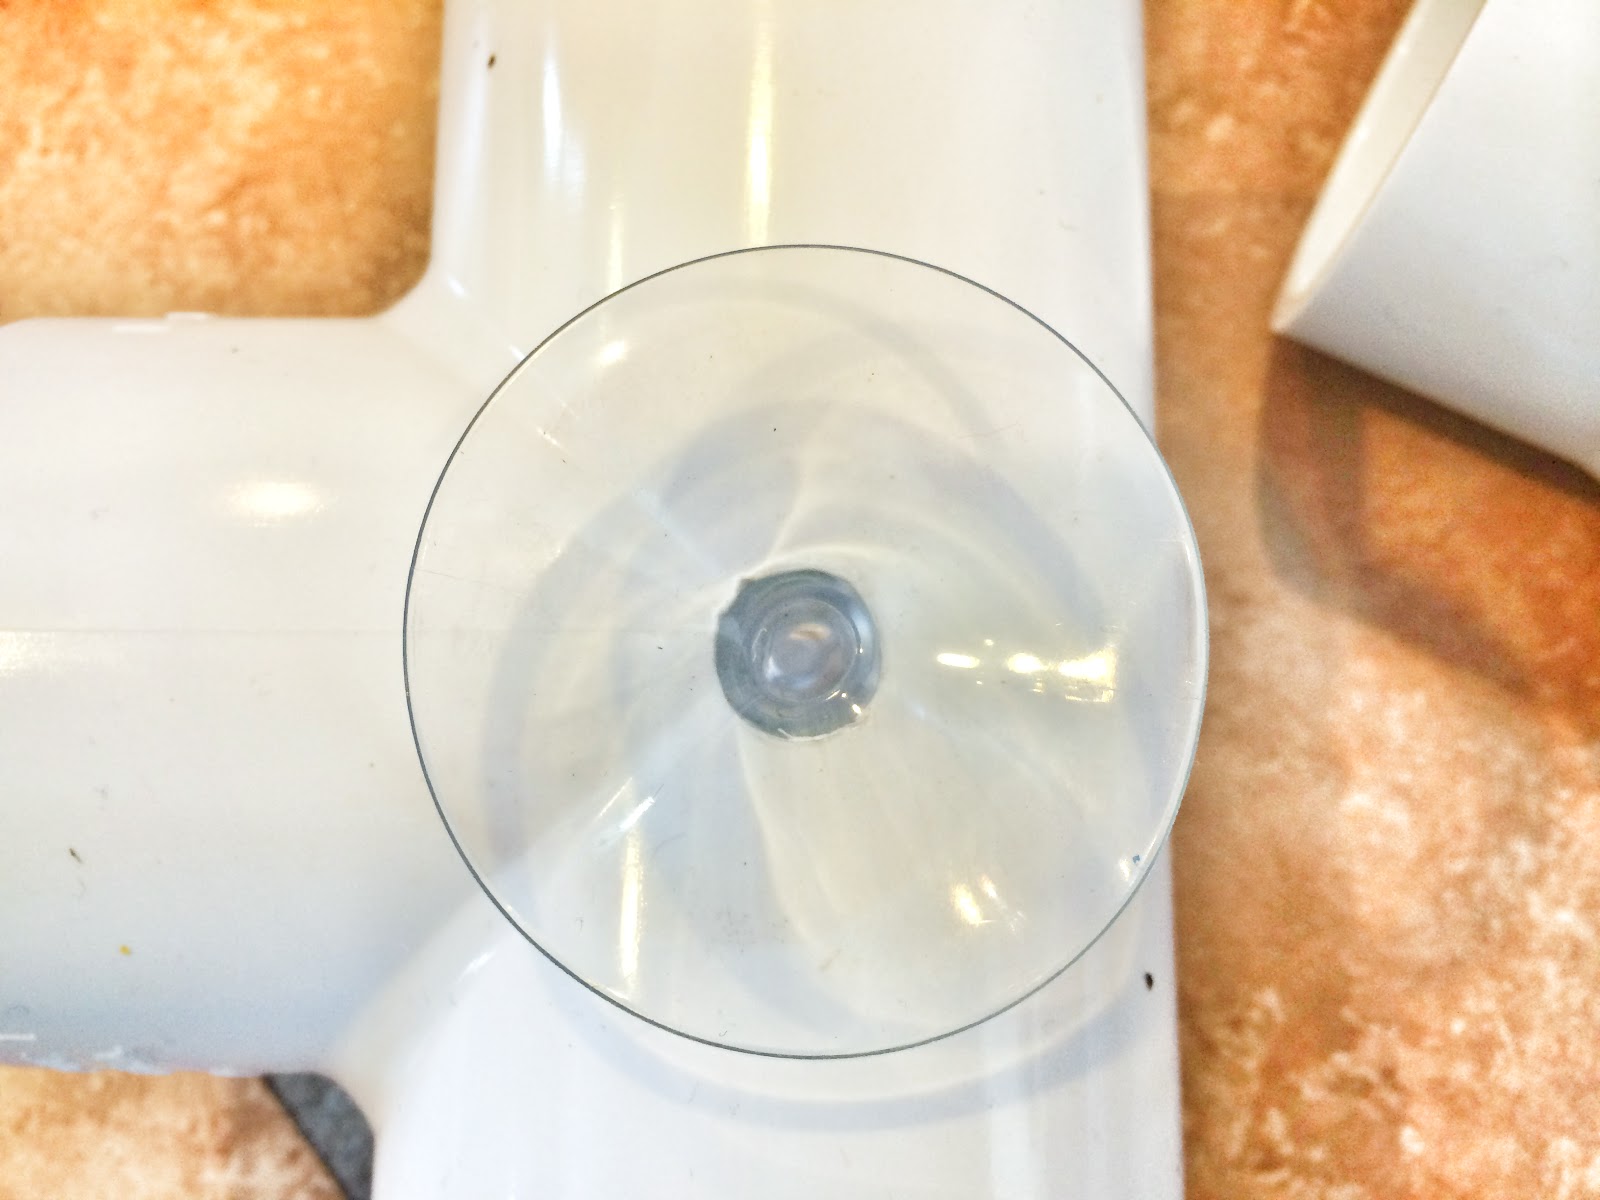
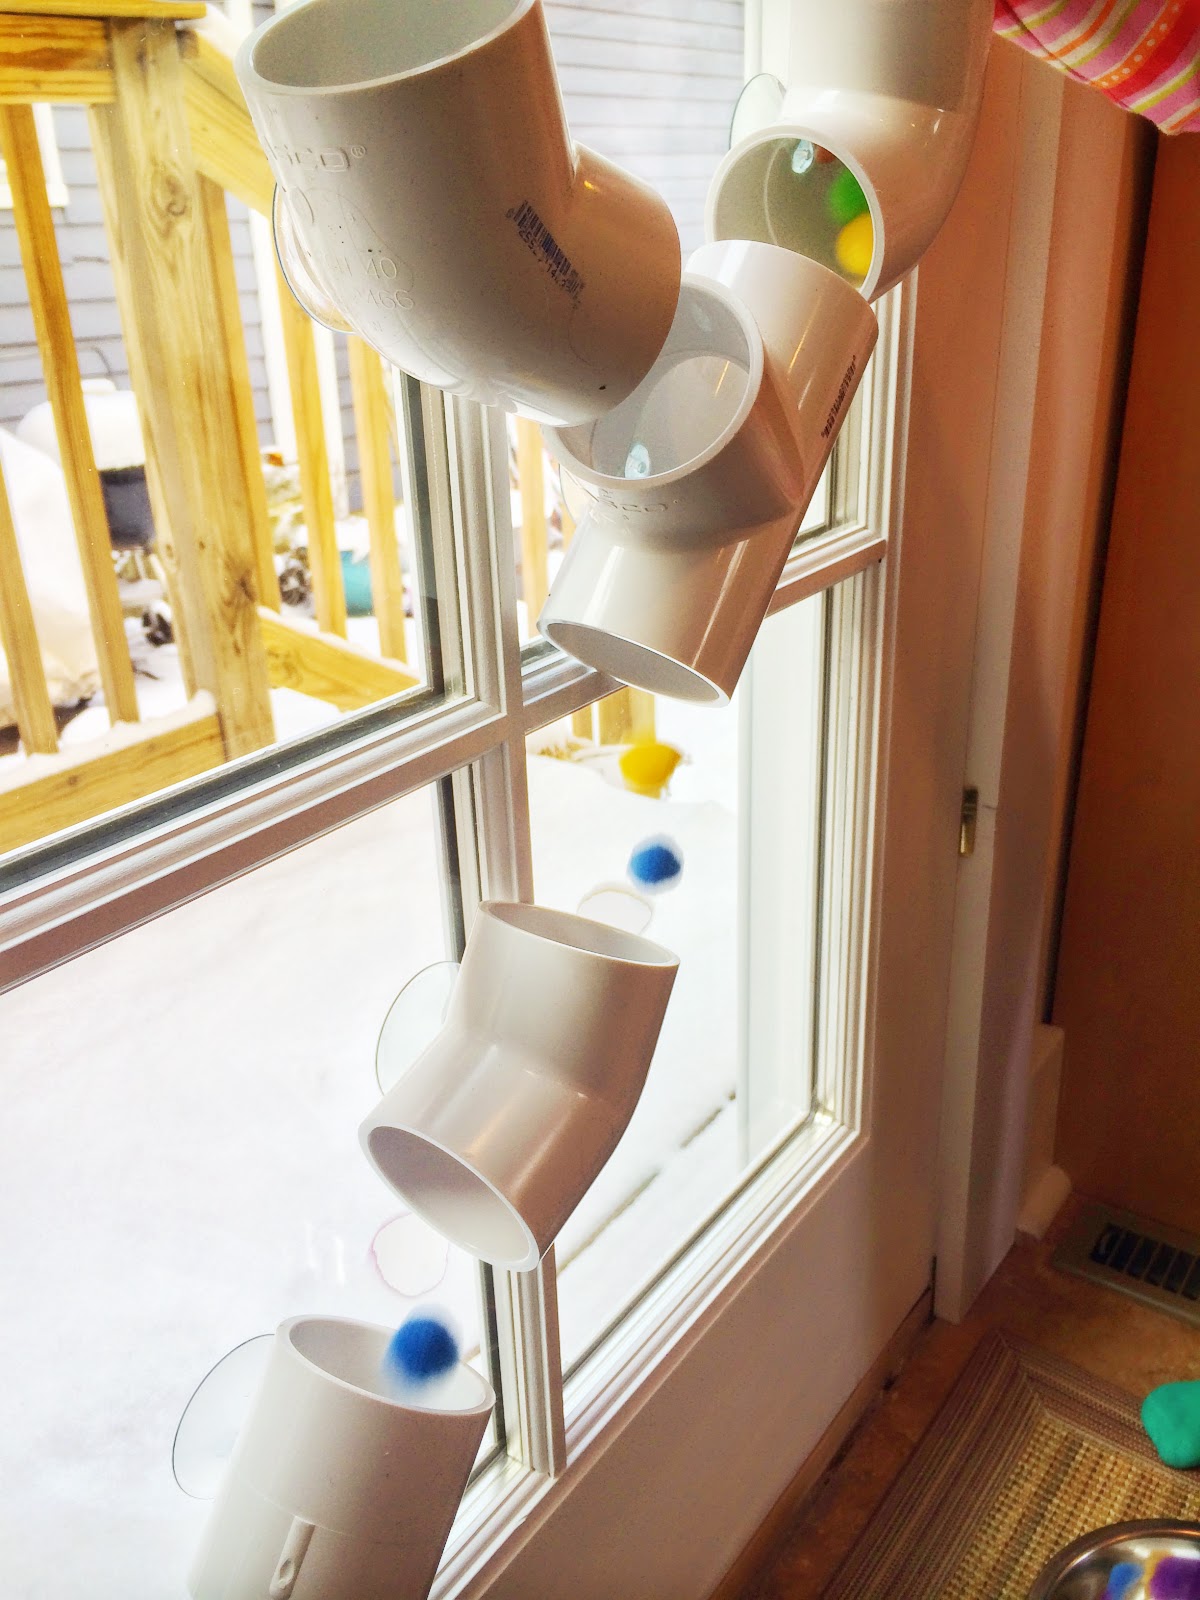
We found these suction cups at the craft store and they were perfect...just remove the little, metal hook. 


First, drill a hole in the middle of one side of each PVC connector. Compare the suction cup piece with the drill bits to figure out the right size to use...you can always drill a bigger hole if need be, so start with the smaller bit if you're deciding between two. Using the flat head screw driver, pry and poke the suction cup into the PVC connector. 


Now, time to play!!! Press the tubes onto a sturdy glass door or window and let the fun begin! It's fun letting the kids experiment with placement of the tubes!


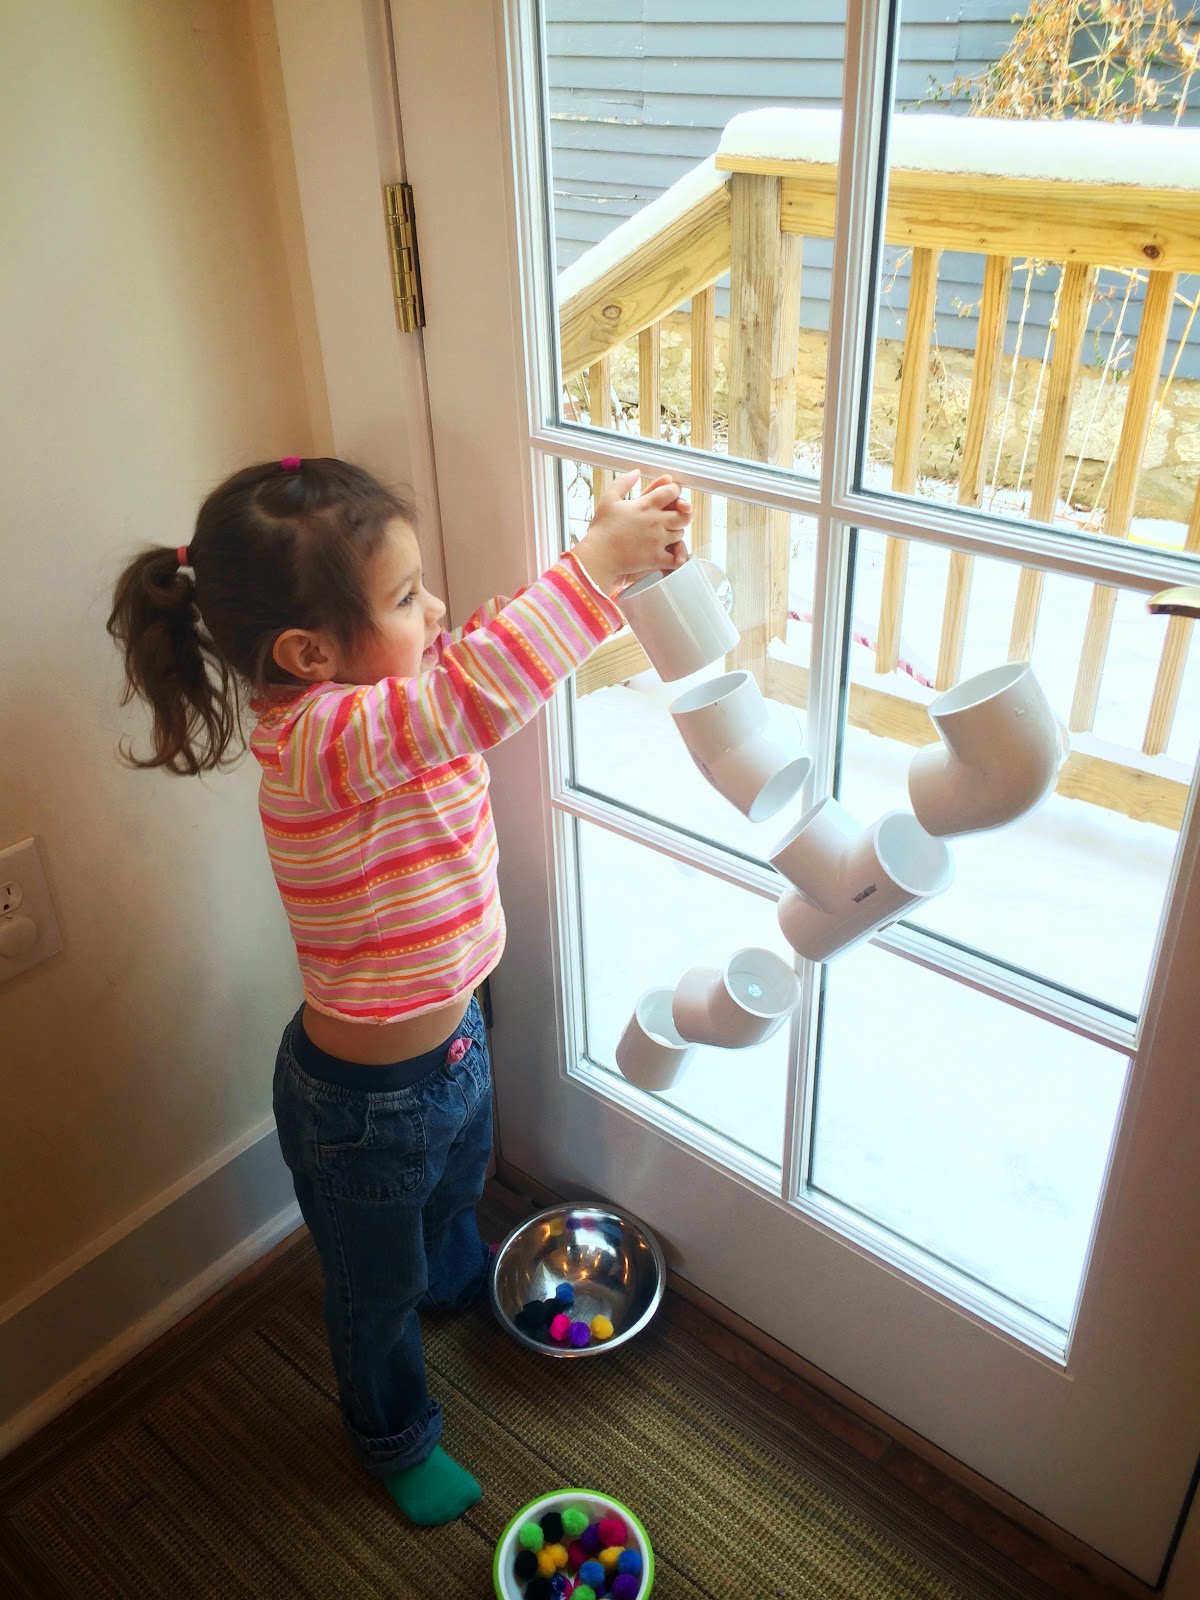
If your "Ball Drop" has two starting places, it's fun to race the balls down...see whose comes out first!


To mix things up, give your kid a spoon or tongs to pick the balls up and drop them down! 


Get crazy! Have fun! Enjoy!!!

Saturday, January 24, 2015

10 Non-Candy Valentine Ideas!

Valentine's Day is just around the corner...time to spread a little love and happiness! Instead of giving out candy this year, why not make some NON-CANDY VALENTINES for friends and loved ones? Here are a few ideas for your kids' friends and for yours...you may even want to make a "Thumbprint Necklace" for yourself! Most of these are really quick and easy to make too! Enjoy!!!


Just click on the link under each picture for the "how-to!"

For kids:


For adults:


Wednesday, January 21, 2015

Melted Crayon Rocks

I remember doing this craft as a kid and how much I loved it, so today I introduced MELTED CRAYON ROCKS to L. And of course, she loved making them as well!!! It was the perfect way to spend this snowy afternoon! 


This is definitely a craft to do with older kids, as the rocks get extremely hot! L was just old enough at 3 yrs of age. I constantly reminded her not to touch the rocks and kept a close eye at all times! 

Materials needed:
-rocks
-crayons
-tin foil
-towels, cardboard, or newspapers
-oven mitt or tongs
-oven


First, clean and dry the rocks if there's any dirt on them. Lay them out on a cookie sheet and place in the oven, set at 350 degrees F for 10 minutes. After 10 minutes I turned the oven off, leaving the rocks in there until we were ready to use them. I removed one rock at a time as we went along. 


As the rocks are heating up, remove the paper from some crayons. If you use a knife to carefully cut down the side of the paper, it comes off in one nice, big piece. Prepare your work area with towels, cardboard or newspapers beneath a sheet of tin foil. 


When you are ready to create, remove one rock at a time using an oven mitt or tongs. Obviously, be very careful...you don't want to burn yourself or have the rock fall, roll and burn anyone else. 

Gently press crayons onto the rock and watch the wax melt down the side. Sooo relaxing and mesmerizing!!! You can draw pictures, designs or make them completely random! It's a fun craft to experiment with! 


MELTED CRAYON ROCKS would make sweet little gifts for family and friends...a fun surprise to leave in your neighbor's garden or on their front steps! I think we'll be making more this coming month to hand out on Valentine's Day, because LOVE ROCKS!!! Enjoy!!!


Tuesday, January 20, 2015

DIY Planetarium for Kids

Have your kids ever daydreamed about going to the moon? To Mars or the Milky Way? By making a PLANETARIUM FOR KIDS you can take them to outer space without even leaving your house! 


Last week L and I turned our dining room into a PLANETARIUM complete with the all the planets of our solar system, constellations, "telescopes," MOON DOUGH!, Glow-in-the-Dark Glitter Bottles, Sprinkle Star Sugar Cookies and more! Once you get going on this project the possibilities are endless...your kids will be entertained, playing and learning for days on end! 


First, start by making the planets in our solar system. Find a good picture of the solar system, in a book or online, and talk about the planets. Depending on the age of your kids, you can keep the research brief or stretch it out, talking about the facts and properties of each planet. (I included Pluto when teaching L about our solar system...it was always my favorite planet and last I heard, it was back in the solar system!) Next, cut out circles of construction paper to resemble the sun and each planet. Have your lil one color them! 


Tape your planets to the underside of a table! Depending on what your child is interested in, feel free to add the moon (made out of tin foil), some constellations...anything you all think is important and fun! Having a good time learning about outer space is the most important part here, so if your lil one wants stars all over in random places, go with it! Why not!? Among our randomly placed stars we included the Big Dipper and Cassiopeia. 


Hang some foil stars from the sides of your table for a lil extra pizzaz as well. This was WB's favorite part!


Throw a blanket and some pillows under the table, grab a flashlight and get ready to star gaze! "It's a real campout!" L exclaimed.


Having a flashlight is a must! You can put some SENSORY BAGS (click here) over the flashlight to change colors.


Make some sparkle bottles as well! The GLOW-IN-THE-DARK BOTTLES (DIY here) were a lot of fun with this activity! How many stars can you count? Can you see any constellations in the bottle?


Make a "TELESCOPE" too! 


Materials needed: 
-paper towel tube (or paper rolled up)
-clear plastic (sandwich bag works well)
-star stickers
-rubber bands


Cut the plastic sandwich bag into a small square. Stick some star stickers on top. Place the plastic over the cardboard tube and secure it with two small rubber bands. Looking out the window or at a light with the "telescope," your child will see stars! Maybe even a constellation!


You can also do the reverse...punch some holes out of construction paper (best if they are in the form of a constellation), and shine the flashlight through! The stars will appear upon the wall!


Getting hungry? Make some SPRINKLE STAR SUGAR COOKIES (recipe here) with your kids! It's a quick and easy sugar cookie recipe and perhaps you'll find more constellations as you snack! 


Another fun mess to make as you're exploring outer space is MOON DOUGH! (recipe here) One of our favorites...the silky powder can be molded into shapes and forms and only includes 2 ingredients! 


Have fun with this one!!! What else will you all come up with as you venture out, past our atmosphere???